PalomaTalk
The basics of Internet and all things digital -
designed to help you learn
How to set up a Zoom meeting
This section describes the basics of how to use the mobile version of the Zoom app. The topics that we cover here are:
-
Set up a meeting as a host.
-
Use of the different functions in the meeting.
-
End the meeting.
Set up a meeting as a host
If you are the organiser of the meeting, set it up following these steps:
-
STEP 1: Go to your phone's app screen, find the Zoom logo and tap on it to open Zoom. Sign in with your email and password, as explained previously. In the bottom bar click on "Meetings" (which will be blue when active), and then send an invitation to whoever you want to have a Zoom meeting with. Tap on "Send invitation" and choose from sending via text message or email or other options that pop up.
-
For example, you can choose "Copy to clipboard", go to a WhatsApp chat or start writing a new text message, and then paste the invitation (paste by clicking into the message, hold and, once "Paste" appears, tap on it. (See the BASICS section of this website for more on basic smartphone actions.) Once the other meeting participant(s) receive their invitation, you are ready to go.
-
NOTE: The invitation contains your personal meeting ID, which is an identifier of the meeting room. If you decide to change the time of your meeting, you can use the same meeting link and do not need to resend the invitation.
-
STEP 2: After you have invited the other parties, tap on "Meet and Chat" at the bottom of the screen and then onto the orange "New Meeting" sign (circled in blue in the example picture). Allow the phone to use video and use your personal meeting ID both by shifting the toggle to the right in order to choose those options once asked and allow the Zoom app to take pictures and record video. You will only need to do the second part once - your phone will remember it the next time you use Zoom.
-
STEP 3: You will see yourself on the screen and a toolbar at the bottom of the screen showing different functions. On this toolbar you will see (from left to right) the symbols for muting/unmuting, video stop and start, participants, screen sharing, and more. If you cannot see the bottom bar, just tap the screen and the bar will appear. You can tap the screen again to make it disappear, and if you do not touch your screen for a while, it will disappear automatically.
-
STEP 4: Next you will need to let the other participants into the meeting room. Tap on the "Participants" sign at the bottom of the screen and you will see yourself under Participants (here Paloma Talk is the host), and Corinne in the waiting room - "Waiting". Click on the blue "Admit" sign to let your guest into the room.
-
STEP 5: You are now ready to chat in the meeting like Paloma Talk (in the example picture) is ready to chat to Corinne. Note that your picture will be small and you will see your guest as the big picture on the screen and the name in the bottom left corner (here it is in landscape mode because the guest is using Zoom on the computer - you will see a portrait picture if the other person is using a phone as well).


Use of the different functions in the meeting
You will see the meeting options, such as the camera/microphone settings, on the toolbar below the screen. Remember that the toolbar can be hidden; you can make it appear by tapping on the screen.
The use of the symbols are explained in the next 7 steps.
-
STEP 1: Microphone and camera settings. The two symbols on the very left side, the microphone and the camera, will let you modify the settings for those. Mute yourself by tapping directly onto the microphone symbol; you will see that you are on mute when there is a red streak through the microphone symbol (also when the toolbar disappears when you are not active). Tap on the screen and then on the microphone in the toolbar to unmute yourself again.
-
If you tap on the camera symbol, you can stop the video and your picture will disappear. Tap onto the same symbol again to start it again.
-
STEP 2: Share screen. You can use this function to show your screen or a white board you can draw onto to the other person, for example if you want to explain something. Tap on the "Share screen" symbol and choose between the different options for sharing by tapping on the one you want on the dropdown menu. Zoom will ask for permission to show things on top of other apps - allow this by sliding the toggle next to the statement to the right. (Once you give permission, you do not need to repeat this every time as the app will remember it.) If you choose to share a white board, you will see the white screen you can draw and write on. Tap on "Stop share" at the bottom whenever you want to finish the screen sharing. If you do not see the stop share/bottom toolbar, then, similar to the main toolbar, tap onto the screen to make it reappear.
-
Participants. Tap on this symbol to see who is already on the meeting and to invite new participants.
-
STEP 3: More. All the settings explained in the next steps you will find when tapping on "More" in the bottom bar. If you tap on "Disconnect audio" (in red), you will mute yourself and will not be able to hear the other participants anymore. If there are several people in the meeting, they will not be able to hear you anymore, but communication between them will be uninterrupted. You will be able to connect the audio again by tapping on a symbol appearing on the bottom left corner of the toolbar.
-
STEP 4: Reactions. Tap onto the symbol you want to send and it will appear at the bottom of your picture, visible to everyone in the meeting. (In the example picture you see Paloma Talk alone in the chat room sending a heart - but this is how people on the other end will see the reaction.)
-
STEP 5: Security. This includes meeting settings such as controlling the waiting room and participant allowances that you can control if you are hosting the meeting. You will only see the security settings if you are the organizer of the meeting.
-
STEP 6: Chat. If you tap on "Chat", you can send messages to everyone or a selected participant in the meeting. If someone else sends you a message, it will appear in a pop up message that opens when you tap on it. In the example below Paloma Talk has sent a message to everyone and then to Corinne privately, and has set the drop down choice back to "Everyone" for the next chat message in line.
-
NOTE: If you write in the chat during a meeting, your camera will switch off and you will show to the other person as a name on the screen only.
-
STEP 7: Meeting settings. The meeting settings include what you can control as host in the top section, for example if you want to mute people when they enter the meeting room, or if you want to play a sound when people enter or leave. In the bottom section you can find the general options, such as whether you want to display the other meeting participants in gallery view.
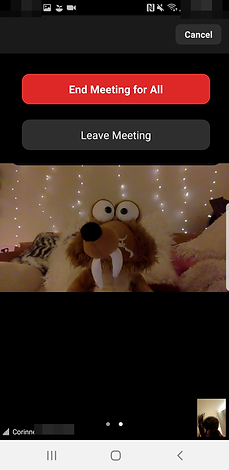
End the meeting
If you want to end the meeting, simply tap on the red "End" sign in the top hand right corner (tap onto the screen if it is not visible). Choose between "End meeting for all" or "Leave meeting". Choose "Leave meeting" if there are more people in the meeting that want to stay on - if you are the host, you will transfer the host privileges to someone else when asked. "End meeting for all" will close the meeting room and cut off all participants.